KHHsubs
Combat Basics
Enemy Types
There are 14 types of enemy in this game. Where it says "Base Experience" on the cards below, that refers to the experience you get for defeating that enemy type with regular attacks. When you defeat an enemy with heat actions, you get an extra 10% experience. The collection found here only contains regular enemies, not bosses (including wanted men you encounter in the bounty substories)
Enemy Types
Brawler
Base Experience: 100

Unarmed fighters - The most basic of all the enemy types. This type tend to show up a lot in requests and commissions, as well as random encounters in Gion. They will use regular punches and kicks, but sometimes will also attempt to grab Kiryu. This type is quite weak so you shouldn't run into any trouble defeating them.
Swordsman
Base Experience: 150

You'll encounter this type during the main story, in requests, and also in random encounters outside Gion. The most basic of the sword-wielding enemies in the game. There are actually 3 sub-types of this type, each one using a different stance - High Stance, Middle Stance, Low Stance (relating to how they are holding their sword). The techniques this type uses varies depending on their stance. The high stance enemies are the strongest, while the low stance are the weakest.
Brigand
Base Experience: 100

A sword-wielding enemy often encountered in random encounters in place like Forest Road, Mountain Road, and Cliff Road. They prefer to attack when they have an opening. Their attacks can be a little difficult to read though. Dodge-rolling behind them and attacking them when they are vulnerable is a good way to deal with this type.
Shortswordsman
Base Experience: 100

Enemies that use a shortsword in battle. They often appear alongside swordsman or brigand enemy types. They prefer to keep their distance and then rush in with an attack. This type tends to use stabbing attacks rather than slashing ones. They try to avoid fighting head-on and will try to attack from the side or rear. They don't have much health though, so they aren't much of a threat.
Martial Artist
Base Experience: 300

Another unarmed enemy type - this one has more health than the brawler type. They tend to appear in random encounters in Gion, but can appear outside Gion as well. Like the brawler, their basic attacks are punching and kicking, but this type has a tendency to grab and throw Kiryu whenever they get a chance to do so.
Martial Arts Expert
Base Experience: 300

The strongest of the unarmed enemy types. These enemies are older men with grey/white hair. When they adjust their stance, spreading both hands out, that is a counter-attack stance and they will counter your next attack (even if you attack with a sword), so watch out for that.
Archer
Base Experience: 200

They wear an outfit similar to the swordsman or brigand types, but are equipped with a bow weapon. They keep themselves a certain distance from Kiryu and attack from range. Kiryu gets stunned briefly when hit by an arrow, leaving you open to attacks, so be careful. It is possible to defend against arrow attacks with the single sword and two swords styles, not just the greatsword style.
Arquebusier
Base Experience: 200

Similar in appearance to the archer type, but fights using an arquebus weapon. They don't have much health so they try to keep their distance from Kiryu. You cannot block attacks from this type using regular swords - you can only block using greatswords or clubs. After firing a shot, it takes them some time to reload before they can fire their next shot.
Swordmaster
Base Experience: 1000

The strongest of all the sword-wielding enemy types. You will encounter this type during the main story, as well as in some requests. You get a lot of experience for defeating these enemies. When this type sheathes their sword, they will attack you with an "Iaido" technique. You cannot damage them while they launch this attack and if they hit Kiryu with it, he will always fall to the ground. The best way to deal with these enemies is to dodge-roll behind them just as they attack, then strike from behind while they are vulnerable.
Ninja
Base Experience: 200
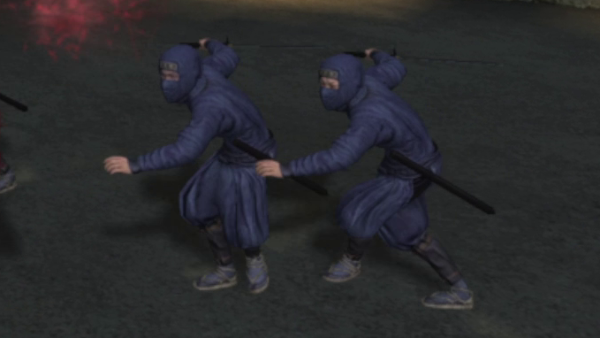
This type refers to the ninja henchmen you encounter during the game. They are skilled at evading attacks and use a shortsword weapon to attack Kiryu. If they are a certain distance from Kiryu they may also attack using a makibishi. From 12-7 onwards you will also encounter ninja who use an arquebus. Though the ninja type is tough, these enemies don't have much health.
Wrestler
Base Experience: 300

An unarmed fighter who uses sumo wrestling techniques. This type focuses on grabbing and throwing Kiryu as often as possible. When they grab you from the front, it is not possible to escape these grabs in the same way you can with other enemy types. It is also not possible to grab this enemy type using
Brute
Base Experience: 2000

A very rare enemy type. You'll only encounter this type in 10-14 and 10-15 in the main story. They are large men with a lot of health. They do a lot of damage and have a high attack force as well, so it's difficult to defend against their attacks. When they are near certain debris on the battlefield, a special heat action is triggered.
Armoured Warrior
Base Experience: 1000
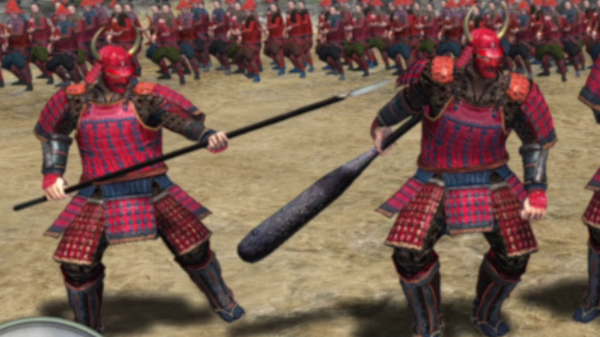
This is a common enemy type in the end section of the game. Some of them wield a spear while others wield a club. They have an armour gauge as well as a health gauge, making them difficult opponents to defeat.
Gold Warrior
Base Experience: Varies
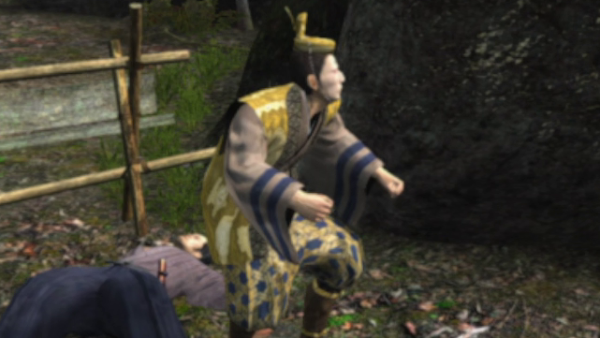
This enemy type is only found in random encounters. They are very weak unarmed enemies. You are extremely unlikely to bump into one during the main story, but they are a little more common in the premium adventure mode. The Golden Bowl items they drop when you defeat them can be sold for 5 Ryo.
The Doshin
A doshin is an Edo-period policeman who is appointed to keep law and order in the streets. The simplest way to think of this guy is that he serves to hinder Kiryu's ability to freely explore Rakugai. He will appear from 6-1, when you walk by the police box in the top-left. The doshin's location is indicated by a pink/pale-red circle on the map and he will constantly patrol the streets. If he gets close enough to Kiryu, he will spot him and start chasing him. He summons 2 more doshin to help him when this happens, so you will be chased by 3 of them. If one catches you, a fight will begin. In the fight, besides the doshin himself, you also fight 3 of his assistants wielding spear weapons. However, even if you beat him you don't get any experience or reward of any kind. So you're better off just avoiding the fight completely.

When you are spotted by the doshin, you will get chased by 3 of them across Rakugai. When this happens, you are not able to use the palanquins or save at the Jizo statues.
Random Encounters
This section talks about the fights in the game that are not related to the story, or any of the game's side content. "Random encounters" are fights with guys you can encounter while travelling the various maps in the game. If you bump into these guys, a fight will begin. For details regarding the spawn points for these random encounters, as well as the rewards you can receive, see the encounters page of this guide.

When you open all the storage lockers in the game, you are rewarded with the Lucky Beads. If you equip this item, random encounters are removed from the game, allowing you to move around freely without worrying about getting into fights.
Encounter Levels and Enemy Numbers
The number of enemies you encounter in a fight is determined by the encounter level. At level 1, you'll get 2-4 enemies. Levels 2 and 3 is 3-5 enemies. Level 4 is 5-8 enemies. The encounter level changes as you progress through the story.
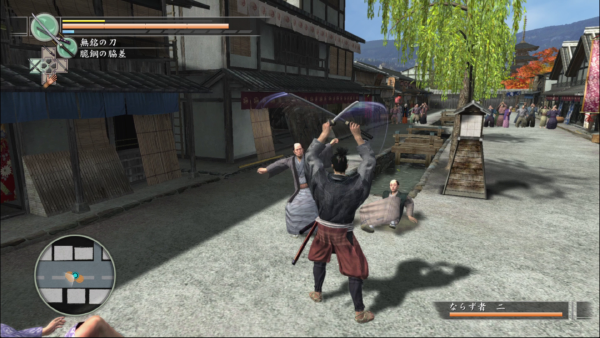
Many enemy types will back off when you change weapons in combat (e.g. drawing your sword). This does not have any effect on the Martial Arts Expert type.
Items and Money
You will receive items and money when you win a random encounter battle. Some enemies carry pouches/containers (they glow, so it's easy to spot enemies who have them). When you defeat that enemy, you can collect the item by walking over it after it drops. Note that the battle ends when you defeat the final enemy, so if that final enemy is carrying an item you won't get the opportunity to pick up that item. Therefore, you should defeat the item-carrying enemies first. The experience you gain will vary depending on the enemy types you defeat. Also, the amount of experience you gain is reduced if Kiryu's level is high.

In regards to the pouches/containers carried by enemies in battle, if it glows green it is either an equipment item or an item from the "other" category, and if it glows yellow it is a recovery item.
Using the Environment
Remember to use the battlefield environment to your advantage. You will often find useful items lying around that you can use as weapons. But also there are certain environment-specific heat actions that can only be used in certain locations in the game. Check the heat actions section of this guide for details, such as locations and conditions for the environment-specific heat actions.

When you are on Cliff Road, for example, you are able to use a heat action which throws an enemy into the valley, instantly defeating them.
Weapon Attack Force
The attack force of a weapon refers to the impact that weapon has with each strike. The heavier the weapon, the greater the attack force, and defending against such attacks with lighter weapons will result in the guard being broken. When guard is broken it opens up an opportunity to take damage from further attacks (e.g. a combo attack). But breaking guard by iteself does not deal any damage.

Differences in attack force become clear in one-on-one fights in the arena. When your guard is broken, you cannot attack for a short time.
What Determines Attack Force
How the force of an attack is calculated is incidated on the table. The "Motion Attack Force" of Kiryu and enemies is not indicated anywhere in the game. Motion Attack Force is a number assigned to certain attacks or techniques. The more powerful the attack or technique, the higher this value. It is not possible to determine attack force in any objective sense, but it's enough to remember that more powerful attacks and techniques will result in more attack power.
Attack Force
| Kiryu's Attack Force | Kiryu's Base Attack Force (Power divided by 10) + Motion Attack Force + Weapon Attack Force |
| Enemy Attack Force | Enemy's Base Attack Force + Motion Attack Force + Weapon Attack Force |
Weapon Types and Attack Force
The table here shows the 3 weapon classifications in terms of attack force. Bear in mind this is a generalisation and exceptions do exist - for example, there are some longswords that have greater attack force than some greatswords, but generally the greatswords have greater attack force. Using weapons in a higher rank will help prevent your guard from being broken. For example, attacks from longswords won't break the guard of someone using a greatsword or club. Unarmed (Brawler) is included in the "Weak" category, but remember that you cannot defend against sword attacks, so there's no opportunity for an unarmed guard to be broken when it comes to those kinds of attacks.
Weapon Attack Force Classification
| Weak | Small weapons, one-handed weapons (that you pick up in the battlefield) / Unarmed (Brawler style) |
| Medium | Single Sword / Two Swords / Spear / Kusarigama |
| Strong | Greatsword / Club / Two-Handed Weapons (that you pick up in the battlefield) |
Boss Fights
Many bosses you encounter in the game are exceptions to the above rules of attack force. They will often strike with a force greater than that of the "strong" category listed above. For example, there are times when even using a greatsword won't break a boss' guard, or times when even when defending with a greatsword your guard will be broken.

Tsuruya's Ito is a good example. Most of his attacks will break your guard even if you are using a greatsword. In these situations it is better to avoid defending and focus instead on evading attacks.
Knockdown Attacks
Throws, as well as other attacks which knock an enemy to the ground, are an important component of combat. Enemies on the ground are defenceless and vulnerable to your attacks. Another great advantage of throws is that you can knockdown nearby enemies by throwing a grabbed enemy into them. There are various techniques that can force an enemy to the ground and mastering them can give you a big advantage in combat.

Basic attacks can be enhanced through training. For example, a longer combo attack. The power-ups provided can sometimes include the ability to knock down opponents.
Mastering Throws
The simplest way to force an enemy to the ground is to grab and throw them using the button while using the brawler style. This throwing ability can be improved by training at the Gion Martial Arts Dojo. There are three training sessions related to throws. Power Throw #1 improves the damage of the throw. Power Throw #2 improves the damage other enemies receive when you throw an enemy into them. Grab Reversal lets you throw an enemy when they grab you.
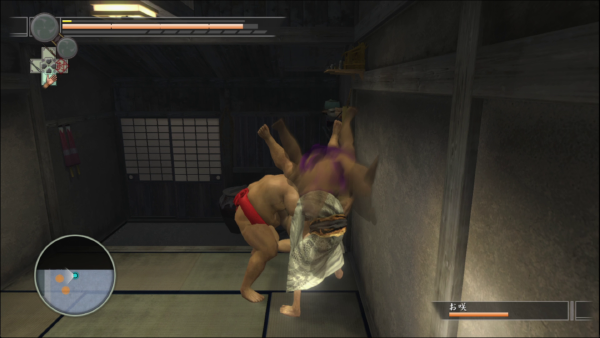
You cannot throw the wrestler enemy type using normal throws. However, it is possible to throw them using Grab Reversal - as long as they don't grab you from the front.
Knockdown Attacks
There are many attacks that can knock enemies to the ground. Brawler, Single Sword, Two Sword, and Greatsword styles all have knockdown attacks. Brawler knockdown has already been explored (i.e. throwing). For single sword, using after a combo launches a strong attack which knocks enemies down. For the two sword style, using a strong attack after a combo of at least 4 attacks will cause the enemy to go to the ground. However, you must complete the necessary training to upgrade the combo of the two sword style before you can use this attack.
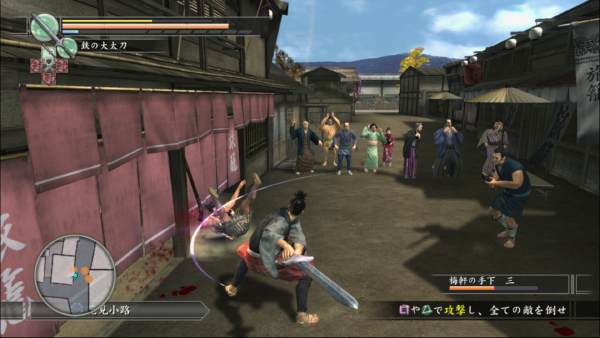
For the greatsword style, landing all 3 hits of the combo will knock an enemy down. It is also possible to learn a powerful technique through scarecrow training which can knock down many nearby enemies.
Other Weapons
It is possible to knock down enemies with other weapons as well. The Jitte, Umbrella, and Kiseru can all knockdown an enemy with a single attack. Be careful when using it because the attack animation is quite long, leaving you vulnerable to other attacks. As for weapons you find lying around the battlefield, one-handed weapons work like the jitte (a attack will knock them down) while two-handed weapons can knock down enemies with either the or buttons.

The Tengu Staff weapon is an exception here. You'll only knock down enemies with this weapon if you hit them with a full 3-hit combo.
Group Fights
The most important thing in fights with multiple enemies is to ensure you don't get surrounded. You particularly want to watch our for attacks from behind - unless you are using the two sword style, you won't be able to defend against these attacks. Fighting with your back against a wall is a good way to prevent enemies coming up behind you. You could also get attacked from behind with attacks that have a high attack force, meaning you can't defend against them with the two sword style. When enemies get too close behind you, use to create distance. Below suggests three enemies in these battles you should prioritise taking out before other enemies.

If you are in a spacious battle area, a good strategy is to force the enemimes to spread out by moving around a lot. Doing so will thin out their numbers and make them less of a threat.
Enemies you should prioritise
Enemies Carrying Items

For enemies that carry pouches or containers, if you don't defeat them and collect the item prior to the end of the battle, you cannot obtain their item. Make sure you don't leave one of these guys as the last remaining enemy, or you'll miss your chance to get the item.
Grabbing Enemies

All unarmed enemies can grab you in battle. The sumo type is particularly dangerous as they can instantly toss you to the ground when they grab you. If they get too close, use to get behind them and attack them while they are vulnerable.
Ranged Enemies

This refers to enemies using a bow or arquebus. Being shot by one of their attacks will briefly stun Kiryu, which includes interrupting combo attacks, and leave you open to other attacks. It's a good idea to take these enemy types out quickly.
Boss Fights
Throughout the game you will encounter many strong enemies in the form of bosses (in the main story) and wanted men (in the bounty substories). Many of these guys are accompanied by henchmen. It's a good idea to get rid of those henchmen first, so you can get down to a one-on-one fight with the boss. When you are fighting a boss in such a situation, it's extremely useful to use the button to focus on him. This will ensure you are facing him during the fight, making it effective in a "duel" situation (i.e. when you are one-on-one with a tough opponent).
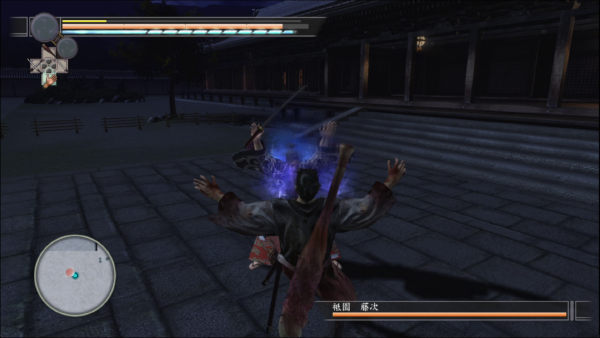
Some bosses and wanted men will be able to grab and throw you. You will also notice you won't be able to throw some bosses - nor even grab them at all.
Recovery Items
It's important to make sure you have recovery items when going into battle against boss enemies. Not just to recover your health using vitality pills, but also to put yourself into heat mode with frenzy pills. The All Purpose Pill - Ultimate will fully restore your health and max out your heat gauge, so it's useful to have a few of those on you in these battles. In some boss fights they will have henchmen fighting alongside them. Some of those henchman may be carrying items. You should definitely take them out first and collect their items - they often drop recovery items.

Don't miss out on the useful items some of the henchmen have on them - take them out first, collect the items, then clear out the rest of the henchmen before facing the boss one-on-one.
Check Equipment
You can use the enemy data section of this guide to find out what weapon a boss or wanted man uses and plan accordingly. For a few bounties, there is a greater reward if you take them in alive (in gameplay terms, this means defeating them with anything other than a sword). You can of course still use a sword in these fights, but the finishing blow must be done without a sword if you want the bonus reward for those bounty substories. Some boss fights have special heat actions you can perform. So make sure you are correctly equipped to perform them.

For those wanted men who must be defeated without a sword in order to obtain the bonus reward, you don't necessarily have to use the brawler style - using weapons lying on the battlefield is also acceptable.
Boss-Specific Heat Actions
This game features some heat actions specifically for use against bosses, known as "Secret Sword" techniques. See the melon cutting training section for details about how to learn these heat actions. Of those, there are a few which can only be used against specific bosses. If you don't perform the heat action in those boss fights, you will not get another chance to do so on that playthrough. You must be equipped with the correct weapon to perform the heat action, so check the conditions/requirements beforehand to make sure you don't miss it.

Not only do you need the correct equipment, but you must also successully complete the QTE before you can execute the heat action.


