KHHsubs
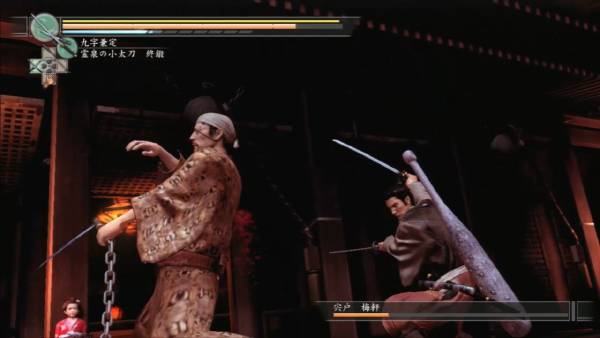
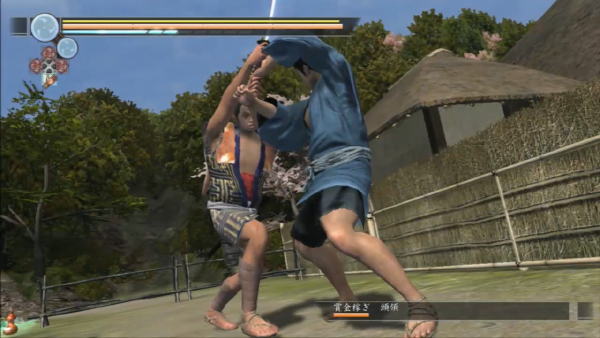
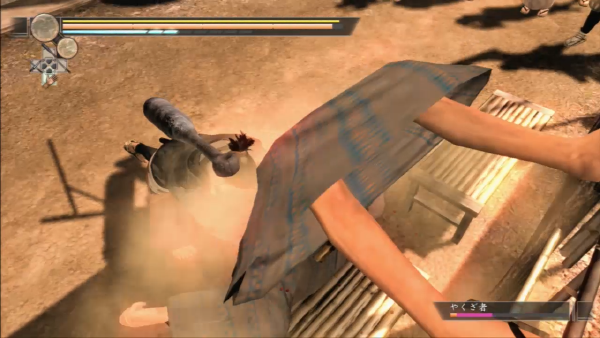
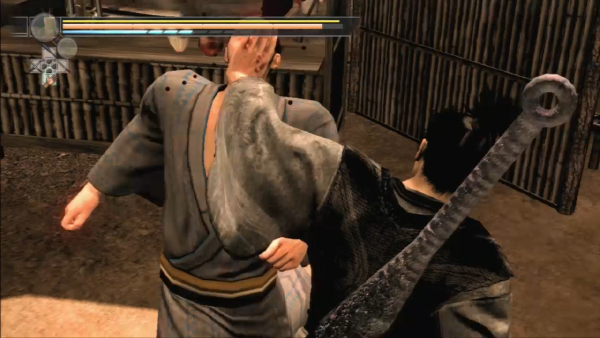
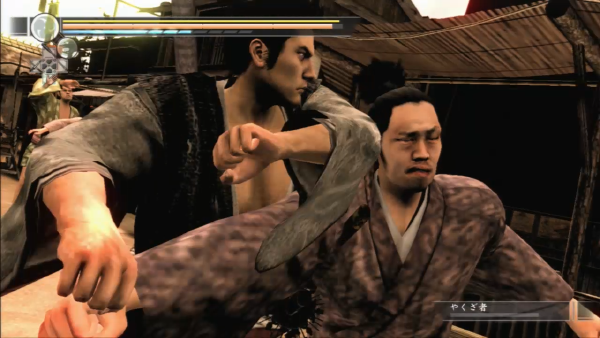
Heat Actions
Overview
On the completion list, there are 9 categories of heat action with 56 heat actions in total. 29 of these are included on the abilities completion list. However, while for abilities completion you only have to learn the heat action, for heat action completing you must execute the heat action.
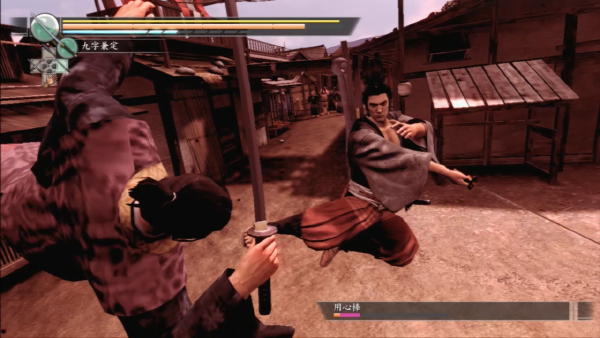
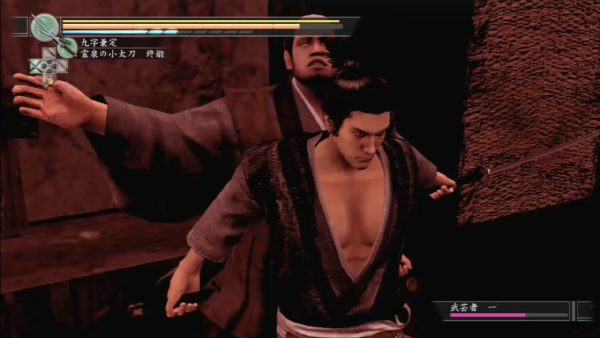
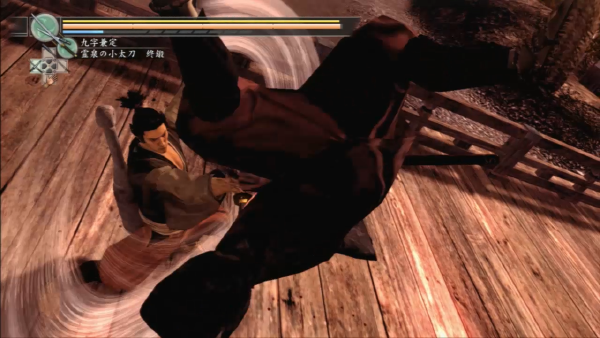
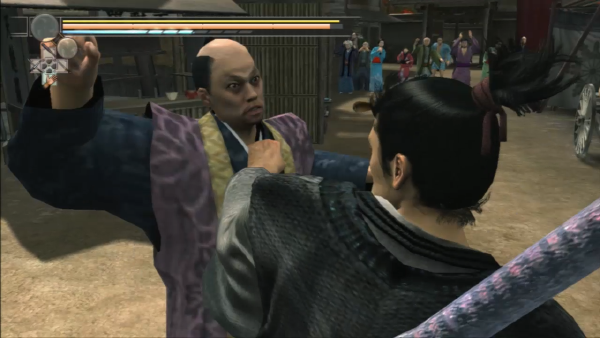
In order to execute a heat action, you must first go into heat mode by building up your heat gauge. When you are in heat mode, the heat action icon will appear at the top-right of the screen when it is possible for you to perform a heat action. Press to perform it.

Sometimes the window in which you can execute a heat action is very small. There are some heat actions for which you must press right away or you'll miss your chance to execute it.
How to learn heat actions
There are various ways to learn new heat actions, but the most common way is through revelations. There are 18 heat actions learned in this way. The second most common way is through training. You learn 13 heat actions in this way. Of the remaining heat actions, 24 don't need to be learned (i.e. you start off with them) and the final one is learned by witnessing a certain event in the final chapter.
Equipment required for heat actions
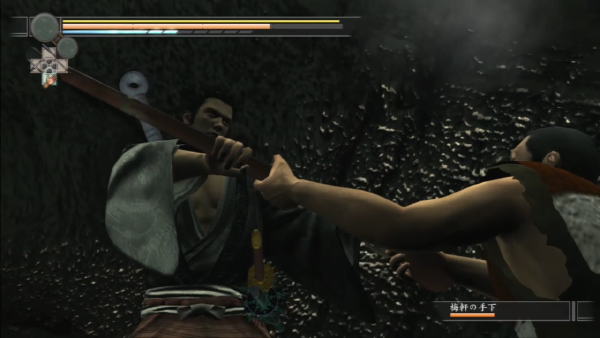
The heat action you can perform will vary depending on Kiryu's equipment. For example, the Gion Martial Arts heat actions can only be performed using the brawler style. Similarly, the Strong Sword heat actions can only be performed when you have a greatsword or club equipped. the Shortsword heat actions can only be used when you have a shortsword equipped. For heat actions that can only be performed at specific locations, or when you have a certain weapon picked up on the battlefield, you can only execute these heat actions using the brawler style. There are also heat actions specific for the single sword and two sword styles, as well as heat actions for special weapons.
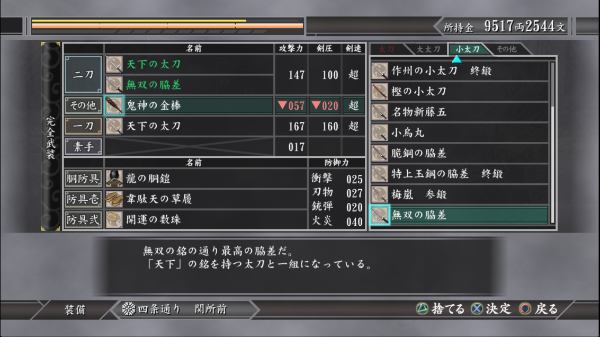
If you want to execute shortsword heat actions, you must equip a shortsword into the "Other" category on the equipment menu.
Heat Action List
There are 56 heat actions on the heat action completion list. However, when you complete the heat actions section, you are able to learn the "Deathblow - Avidya Wasteland" heat action. Below, details of all heat actions our outlined. For the "Location" part, you can find further details on the Encouters section of this guide. For heat actions executed in random encounters, you don't need to worry too much as you can have plenty of opportunities to execute them. However, you need to watch out for heat actions that can only be executed in certain requests, or specific parts in the main story. At the start of the game, Kiryu's max heat is 6800. For each heat gauge upgrade, that max increases by 1200.
Wall Attack Mastery
The most basic of all the heat actions which use the battle environment. You can perform this in most random encounters across Gion and Rakugai.
| Equipment | Unarmed (Brawler style) |
| Target | All enemies |
| Power | 220 (From behind: 230) |
| Heat Consumption | 4000 |
| How to Learn | You start off with this |
| How to Use | Grab an enemy and go near a wall |
| Where to Use | Anywhere with walls (e.g. Gion, Rakugai, Kawara Street) |
| Note | Performing this when you grab an enemy from behind performs a variation of this heat action |
Platform Attack Mastery
Like with Wall Attack Mastery, this can easily be done across Gion and Rakugai.
| Equipment | Unarmed (Brawler style) |
| Target | All enemies |
| Power | 220 (From behind: 230) |
| Heat Consumption | 4000 |
| How to Learn | You start off with this |
| How to Use | Grab an enemy and go near a stand/platform that's around knee-high (e.g. a bench, short wall) |
| Where to Use | Anywhere with a knee-high stand/platform (e.g. Gion, Rakugai, Kawara Street) |
| Note | Performing this when you grab an enemy from behind performs a variation of this heat action |

Pillar Attack Mastery
Along with with Wall Attack Mastery and Platform Attack Mastery, this is another straightforward heat action. The heat consumption is a bit higher with this one, though it also has more power. The pillars on the archway by the Gion Inari Shrine are useful for this heat action.
| Equipment | Unarmed (Brawler style) |
| Target | All enemies |
| Power | 250 |
| Heat Consumption | 5000 |
| How to Learn | You start off with this |
| How to Use | Grab an enemy and go near a pillar |
| Where to Use | Anywhere with a pillar (e.g. Gion, Rakugai, Kawara Street) |
| Note | N/A |

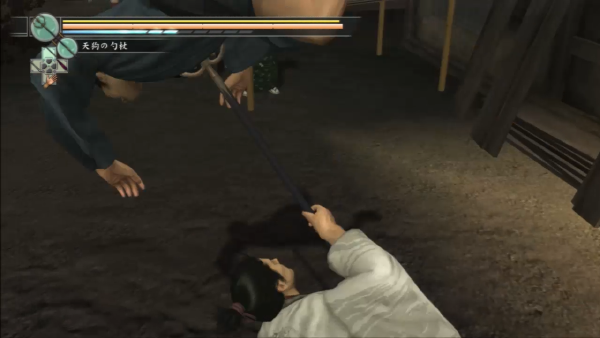
Kamo River Dance
This can only be performed on the bridge on the Kawara Street 4 Battlefield. However, this can be done in random encounters in that area so it's not a problem as you can get into fights here whenever you want.
| Equipment | Unarmed (Brawler style) |
| Target | All enemies (except bosses) |
| Power | Instant Death |
| Heat Consumption | 8000 |
| How to Learn | You start off with this |
| How to Use | Grab an enemy and go near the edge of the bridge |
| Where to Use | Kawara Street 4 Battlefield |
| Note | You can access this any time from 5-12 |

Throwdown Mastery
A heat action making use of rivers (except the one on Kawara Street) and cliffsides. The earliest you can perform this heat action is at 3-1 during the main story. But if you don't perform it then, you can always do it in random encounters on Cliff Road.
| Equipment | Unarmed (Brawler style) |
| Target | All enemies (except bosses) |
| Power | Instant Death |
| Heat Consumption | 8000 |
| How to Learn | You start off with this |
| How to Use | Grab an enemy and go near a bridge (except the bridge on Kawara Street) or cliff edge |
| Where to Use | 3-1 / Random encounters on cliff road |
| Note | You can access cliff road from 9-8 |

Stair Mastery
A heat action which throws an enemy down some stairs. There are not many opportunities to perform this heat action, but you can do it whenever you like in random encounters on River Road.
| Equipment | Unarmed (Brawler style) |
| Target | All enemies (except bosses) |
| Power | 400-900 |
| Heat Consumption | 6800 |
| How to Learn | You start off with this |
| How to Use | Grab an enemy and go near the top of some stairs |
| Where to Use | 7-10 / Random encounters on River Road |
| Note | N/A |

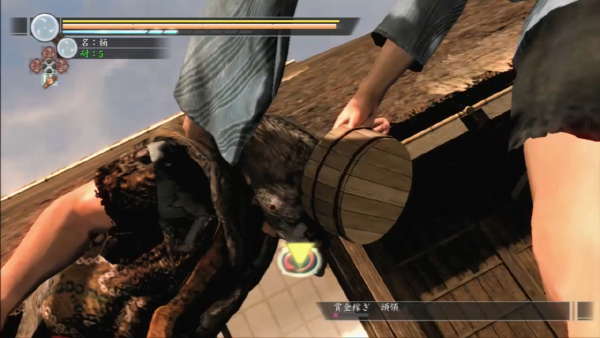
Heavy Drop Mastery
There are few opportunities to perform this heat action. The earliest you can do it is 4-1 in the main story. But if you miss this chance, you can also perform it in random encounters at the Gion Inari Shrine.
| Equipment | Unarmed (Brawler style) |
| Target | All enemies |
| Power | 270 |
| Heat Consumption | 6000 |
| How to Learn | You start off with this |
| How to Use | Grab an enemy and go near a stone lantern |
| Where to Use | 4-1 / Random encounters at Gion Inari Shrine |
| Note | N/A |

Bellows Mastery
A very rare heat action. There is only one opportunity in the game to perform this - during request 56
| Equipment | Unarmed (Brawler style) |
| Target | All enemies (except bosses) |
| Power | 300-420 |
| Heat Consumption | 5000-5900 |
| How to Learn | You start off with this |
| How to Use | Grab an enemy and go near the fire pit in the blacksmith |
| Where to Use | Request 56 |
| Note | The amount of power changes based on how many times you press the button |
Jitte Drop Mastery
A heat action using the jitte special weapon. This can also be performed against enemies wielding wooden swords, so it can easily be performed in Gion.
| Equipment | Jitte |
| Target | Enemies wielding swords |
| Power | 250 |
| Heat Consumption | 6000 |
| How to Learn | You start off with this |
| How to Use | With a jitte equipped, go near a sword-wielding enemy |
| Where to Use | Anywhere |
| Note | You can buy a jitte at the weapon shop any time from 5-5 |

Umbrella Mastery
A heat action using another kind of special weapon, the umbrella. This also works against enemies using wooden swords.
| Equipment | Umbrella |
| Target | Enemies wielding swords |
| Power | 250 |
| Heat Consumption | 6000 |
| How to Learn | You start off with this |
| How to Use | You can use this when a sword-wielding enemy attacks you while you have an umbrella equipped |
| Where to Use | Anywhere |
| Note | You can buy an umbrella at Arigataya in Gion at any time from 6-1 |

Star Actor Mastery
A variation of Umbrella Mastery. This heat action can only be performed in the Star Actor mini-game in Rakugai, which can only be played at night.
| Equipment | Umbrella |
| Target | Enemies wielding swords |
| Power | 300 |
| Heat Consumption | 4000 |
| How to Learn | You start off with this |
| How to Use | You can use this when a sword-wielding enemy attacks you while you have an umbrella equipped |
| Where to Use | Can only be performed during request 32 and the Star Actor mini-game which is unlocked after completing that request |
| Note | N/A |

Smoke Mastery
A heat action using the Kiseru special weapon.
| Equipment | Kiseru |
| Target | Any enemy who is not wearing any head covering (e.g. hat/helmet) |
| Power | 250 |
| Heat Consumption | 6000 |
| How to Learn | You start off with this |
| How to Use | With a Kiseru equipped, go near an enemy |
| Where to Use | Anywhere |
| Note | You can buy a kiseru at Arigataya in Gion any time from 5-1 |
Consecutive Strike Mastery
This heat action uses certain single-hand weapons you can pick up in the battlefield.
| Equipment | Unarmed |
| Target | All enemies |
| Power | 170 - 330 |
| Heat Consumption | 5000 - 10000 |
| How to Learn | You start off with this |
| How to Use | While using the unarmed style, pick up a single-handed weapon (e.g. a pot) and go near an enemy |
| Where to Use | Anywhere you can find a suitable single-handed weapon on the battlefield |
| Note | Power increases each time you press |
Hilt Strike Mastery
This heat action can be performed using a wooden sword. You can't equip real swords in Gion, however using the Gion Martial Arts Sword Take heat action it is posible to take an enemy sword and use it in battle in Gion. You can use this heat action with that real sword while in Gion.
| Equipment | Wooden Sword |
| Target | All enemies |
| Power | 170 - 330 |
| Heat Consumption | 5000 - 10000 |
| How to Learn | You start off with this |
| How to Use | With a wooden sword equipped, go near an enemy |
| Where to Use | Anywhere |
| Note | Power increases each time you press |

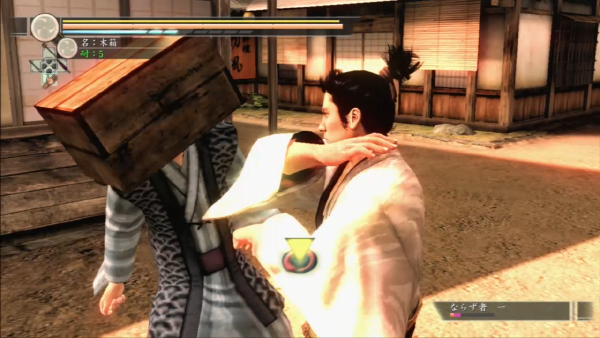
Palm Strike Mastery
This heat action uses certain two-handed light weapons, which can be placed over an enemy's head.
| Equipment | Unarmed |
| Target | All enemies |
| Power | 170 - 330 |
| Heat Consumption | 5000 - 10000 |
| How to Learn | You start off with this |
| How to Use | While using the unarmed style, pick up a two-handed light weapon that can be placed over an enemy's head (e.g. a box) and go near an enemy |
| Where to Use | Anywhere you can find a suitable two-handed weapon on the battlefield |
| Note | Power increases each time you press / |
Cover and Strike Mastery
Much like Palm Strike Mastery, this heat action uses certain two-handed weapons. However, different two-handed weapons will trigger this one.
| Equipment | Unarmed |
| Target | All enemies |
| Power | 170 - 330 |
| Heat Consumption | 5000 - 10000 |
| How to Learn | You start off with this |
| How to Use | While using the unarmed style, pick up a two-handed light weapon that can be placed over an enemy's head (e.g. a basket or bowl) and go near an enemy |
| Where to Use | Anywhere you can find a suitable two-handed weapon on the battlefield |
| Note | Power increases each time you press |
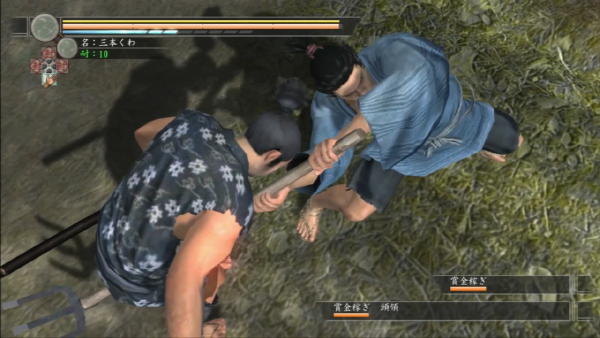
Farming Mastery
This heat action uses a long pole weapon. You won't find any in Rakugai, but you can find suitable pole weapons in random encounters in Kawara Street and Forest Road.
| Equipment | Unarmed |
| Target | All enemies |
| Power | 250 |
| Heat Consumption | 6000 |
| How to Learn | You start off with this |
| How to Use | While using the unarmed style, pick up a long pole weapon and go near an enemy |
| Where to Use | Anywhere you can find a suitable pole weapon on the battlefield |
| Note | N/A |
Thrust Mastery
This heat action uses a spear weapon. Best opportunity to do this is when you acquire a Tengu Staff later in the game.
| Equipment | Spear Weapon (includes Tengu Staff) |
| Target | All enemies |
| Power | 250 |
| Heat Consumption | 6000 |
| How to Learn | You start off with this |
| How to Use | With a spear equipped (e.g. Tengu Staff) go near an enemy |
| Where to Use | Anywhere, once you have access to a spear weapon. |
| Note | N/A |
Powerful Drop Mastery
This heat action uses two-handed heavy weapons you can pick up on the battlefield.
| Equipment | Unarmed |
| Target | All enemies |
| Power | 300 |
| Heat Consumption | 7000 |
| How to Learn | You start off with this |
| How to Use | While using the unarmed style, pick up a two-handed heavy weapon and go near an enemy |
| Where to Use | Anywhere you can find a suitable two-handed heavy weapon on the battlefield |
| Note | N/A |

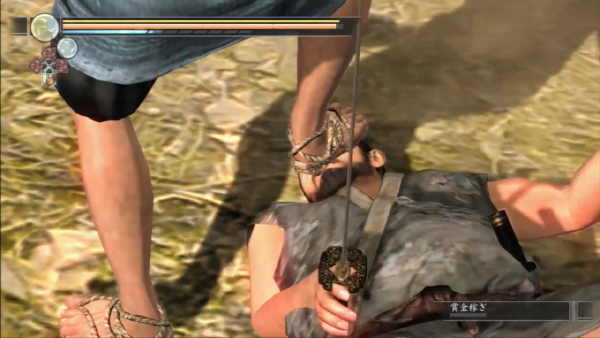
Finishing Blow Mastery
A heat action used on an enemy who has fallen to the ground. If the enemy is lying face-up, this heat action is a stomp. If the enemy is lying face-down, this heat action is a kick.
| Equipment | Unarmed / Special Weapon |
| Target | All enemies |
| Power | 220 |
| Heat Consumption | 8000 |
| How to Learn | You start off with this |
| How to Use | While using the unarmed style (or with a special weapon equipped), go near an enemy on the ground |
| Where to Use | Anywhere |
| Note | N/A |
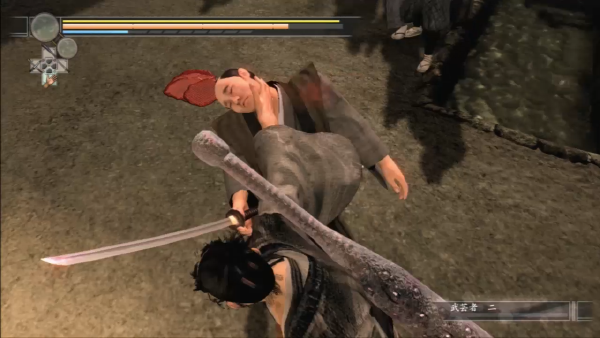
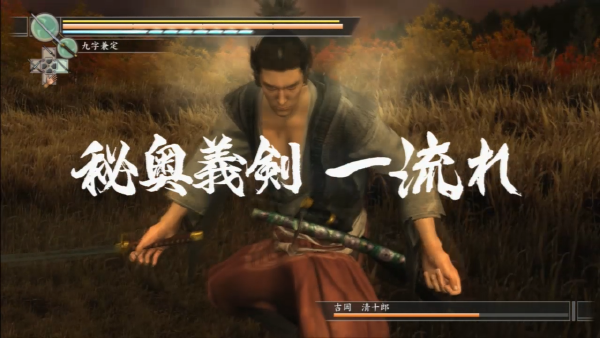
Sword Finishing Blow Mastery
Another heat action used on an enemy who has fallen to the ground. This one is used when you have a sword equipped.
| Equipment | Single Sword / Two Swords |
| Target | All enemies |
| Power | 250 |
| Heat Consumption | 9000 |
| How to Learn | You start off with this |
| How to Use | While using the single sword or two sword style, go near an enemy on the ground |
| Where to Use | Anywhere (except Gion) |
| Note | N/A |

Big Sword Finishing Blow Mastery
Another heat action used on an enemy who has fallen to the ground. This one is used when you have a greatsword or club equipped.
| Equipment | Greatsword |
| Target | All enemies |
| Power | 290 |
| Heat Consumption | 9000 |
| How to Learn | You start off with this |
| How to Use | While using the greatsword style, go near an enemy on the ground |
| Where to Use | Anywhere (except Gion) |
| Note | N/A |

Secret Sword - Shadow Stab
A heat action that can only be used at certain parts in the main story. A good opportunity to use this is at 7-10 during the Tsuruya fire section.
| Equipment | Single Sword |
| Target | All enemies |
| Power | 320 |
| Heat Consumption | 6000 |
| How to Learn | You start off with this |
| How to Use | With a single sword equipped, go near a paper wall/sliding door |
| Where to Use | Areas where you can find paper walls/doors, such as 1-7, 7-10, 12-17 |
| Note | N/A |
Secret Sword - The Sly Cat
This heat action can be performed anywhere, except in Gion. This works even if you hold down the button, so you can focus on an enemy in front of you while waiting for the enemy behind you to attack.
| Equipment | Single Sword |
| Target | All enemies |
| Power | 320 |
| Heat Consumption | 6000 |
| How to Learn | From 5-4, after getting the playful cat picture, look at the cat near the Gion Inari Shrine and have the revelation |
| How to Use | Can be used when an enemy attacks you from behind while using the single sword style (doesn't work on enemies using guns) |
| Where to Use | Anywhere except Gion |
| Note | You can get the playful cat picture from Shichigoro in 5-4 |
Secret Sword - Dancing Mouse
This heat action can be performed anywhere, except in Gion. However, because it requires you to be a certain distance from your opponent, it's difficult to perform in small battle areas.
| Equipment | Single Sword |
| Target | All enemies (except bosses) |
| Power | 270 |
| Heat Consumption | 6000 |
| How to Learn | From 5-6, after getting the flying squirrel picture, look at the flying squirrel on Forest Road and have the revelation |
| How to Use | Can be used while using the single sword style when you are at a distance from your target (must be holding the button |
| Where to Use | Anywhere except Gion |
| Note | You can get the flying squirrel picture from Shichigoro after learning Secret Sword - The Sly Cat |

Secret Sword - Rising Fish
You can perform this by pressing after rolling towards an opponent (pressing twice). It's useful against enemies that are difficult to fight head-on, such as those using greatswords or clubs.
| Equipment | Single Sword |
| Target | All enemies |
| Power | 270 |
| Heat Consumption | 6000 |
| How to Learn | From 6-4, after getting the fish picture, look at the fisherman on river road and have the revelation |
| How to Use | Roll towards an opponent (press twice) while using the single sword style |
| Where to Use | Anywhere except Gion |
| Note | You can get the fish picture from Shichigoro in 6-1 |
Secret Sword - Silent Snake
The conditions to perform this can be a bit tricky. Your best bet is to focus on an opponent who is rising from the ground after being knocked down. If you're struggling to use this in group fights, try doing it in the arena.
| Equipment | Single Sword |
| Target | All enemies (except bosses) |
| Power | 280 |
| Heat Consumption | 9000 |
| How to Learn | From 7-4, after getting the snake picture, look at the snake on forest road and have the revelation |
| How to Use | While using the single sword style, stand at a distance from an enemy who is either rising from the ground or is stunned |
| Where to Use | Anywhere except Gion |
| Note | You can get the snake picture from Shichigoro in 7-4 |

Secret Sword - Swallow's Dance
Because this can only be performed when you are jumping down from a height, there are not many places where this can be used. As well as being at a higher place, you also need an enemy to be nearby (at the lower level).
| Equipment | Single Sword |
| Target | All enemies |
| Power | 350 |
| Heat Consumption | 8000 |
| How to Learn | From 6-3, after getting the swallow picture, look at the swallow on Kawara Street and have the revelation |
| How to Use | While using the single sword style, you must drop from a height while an enemy is nearby (below). |
| Where to Use | River Road 1 / River Road 5 / Mountain Road 3 |
| Note | You can get the swallow picture from Shichigoro in 6-1 |

Secret Sword - Death by Black Kite
This is a counter heat action, used when an enemy equipped with a single sword attacks you. Though it can only be used in limited circumstances, it's pretty powerful considering the relatively low heat consumption.
| Equipment | Single Sword |
| Target | Sword-wielding enemies |
| Power | 320 |
| Heat Consumption | 6000 |
| How to Learn | From 7-6, after getting the black kite picture, look at the bird-watching man on mountain road and have the revelation |
| How to Use | You must be using the single sword style. Can be used when a sword-wielding enemy attacks you |
| Where to Use | Anywhere except Gion |
| Note | You can get the black kite picture from Shichigoro in 7-4 |

Secret Sword - Angry Bull
You need to be at full heat to use this, so it's a good idea to use items like the frenzy pills or all-purpose pills to max out your heat gauge and then perform this straight away. Watch out because if you're holding the button you'll end up performing the Secret Sword - Dancing Mouse heat action instead.
| Equipment | Single Sword |
| Target | All enemies |
| Power | 100 - 420 |
| Heat Consumption | 10000 |
| How to Learn | From 9-5, after getting the raging bull picture, look at the farmer on the farms and have the revelation |
| How to Use | While using the single sword style, stand at a distance from your target (you must be at maximum heat to use) |
| Where to Use | Anywhere except Gion |
| Note | You can get the raging bull picture from Shichigoro in 9-5, after learning the Certain Death - Bull Horns heat action. The power of this heat action increases based on how many times you press |
Certain Death - Tatami Flip
Like the Secret Sword - Shadow Stab, you don't have to learn this heat action to learn it. You cannot use this heat action in random encounters - it can only be performed at certain points in the main story, or in certain substories where you fight in rooms with tatami floors.
| Equipment | Two Swords |
| Target | All enemies |
| Power | 320 |
| Heat Consumption | 6000 |
| How to Learn | You start off with this |
| How to Use | With two swords equipped, use in a room with a tatami floor when an enemy attacks you |
| Where to Use | In any room which has a tatami floor (e.g. Request 35, request 92 |
| Note | N/A |
Certain Death - True Two-Sword Dance
An essential heat action when fighting groups of enemies. However, this cannot be used against unarmed enemies.
| Equipment | Two Swords |
| Target | All enemies wielding swords, spears, greatswords, and other such weapons (does not work on bosses) |
| Power | 180 x2 (180 against each target) |
| Heat Consumption | 10000 |
| How to Learn | From 5-12, after getting the beautiful woman picture, look at the woman in Gion (near the well) and have the revelation |
| How to Use | While using the two swords style, use when at least 2 enemies are surrounding you (or when two enemies are standing in front of you) |
| Where to Use | Anywhere except Gion |
| Note | You get the beautiful woman picture after completing request 18 |
Certain Death - Bull Horns
This is used when an enemy has their back to a wall, so that limits the locations where you can perform this. But there are plenty are places in Rakugai and Kawara Street where you can use it.
| Equipment | Two Swords |
| Target | Enemies wielding a sword or greatsword |
| Power | 320 |
| Heat Consumption | 6000 |
| How to Learn | From 9-5, after getting the charging bull picture, look at the farmer on the farms and have the revelation |
| How to Use | While using the two swords style, use when an enemy has their back against a wall |
| Where to Use | Any battlefield which has a wall (e.g. Rakugai) - but it cannot be used in Gion |
| Note | You get the charging bull picture from Shichigoro when you are at least level 25 |
Certain Death - Hopping Cat
It can be tricky to pull this off, since it requires running towards an enemy from a distance. If you're too quick it won't work and if you get too close you'll end up using the Certain Death - Great Serpent Maelstrom.
| Equipment | Two Swords |
| Target | All enemies |
| Power | 270 |
| Heat Consumption | 8000 |
| How to Learn | From 5-13, after getting the sleeping cat picture, look at the cat at Kiyomizudera and have the revelation |
| How to Use | While using the two swords style, run towards an enemy from a distance |
| Where to Use | Anywhere except Gion |
| Note | You get the sleeping cat picture from Shichigoro when you are at least level 18 |

Certain Death - Great Serpent Maelstrom
A very simple heat action to execute. Just be near an enemy and you'll likely end up using this one when pressing triangle. It's a powerful attack but consumes a lot of your heat gauge.
| Equipment | Two Swords |
| Target | All enemies |
| Power | 400 |
| Heat Consumption | 12000 |
| How to Learn | From 7-5, after getting the poorly drawn yamata no orochi picture, look at the picture story show in Rakugai and have the revelation |
| How to Use | While using the two swords style, be near an enemy |
| Where to Use | Anywhere except Gion |
| Note | You get the poorly drawn yamata no orochi picture when you complete request 53 |
Certain Death - Clear Circle
This can be a tricky one to execute. Use frenzy pills or all-purpose pills to get yourself to max heat and then perform this. If you make even a single mistake during the QTE you won't perform the move and will waste your heat gauge.
| Equipment | Two Swords |
| Target | All enemies |
| Power | 400 |
| Heat Consumption | 10000 |
| How to Learn | From 9-1, after getting the meditating monk picture, look at the dog in Rakugai and have the revelation |
| How to Use | While using the two swords style, stand at a distance from an enemy and hold the button (you must also be at maximum heat to perform this). Also, you must successfully complete the following QTE to execute the heat action: > > > > |
| Where to Use | Anywhere except Gion |
| Note | You get the meditating monk picture when you complete request 75 |
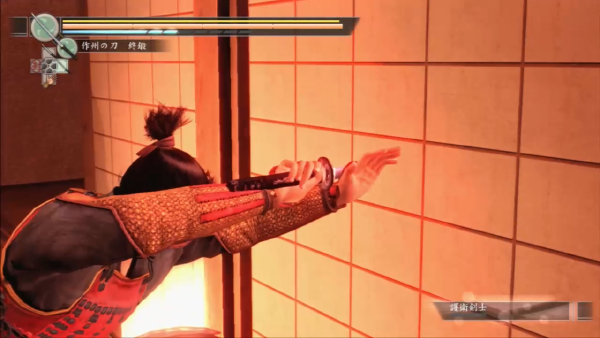
Strong Sword - Mechanical Spin
You only need to be close to an enemy to pull this one off, however it does also require you to be at max heat.
| Equipment | Greatsword/Club |
| Target | All enemies |
| Power | 340 (400 when using a club) |
| Heat Consumption | 7000 (10000 when using a club) |
| How to Learn | From 6-1, after getting the clock blueprint picture, have the revelation in the inventor's house |
| How to Use | While using the greatsword style, go near an enemy (you must be at max heat) |
| Where to Use | Anywhere except Gion |
| Note | You can buy the clock blueprint picture for 2000 Mon from the guy standing around in Ebisuya in 6-1 |

Strong Sword - Fly Swatter
Just like the Certain Death - Bull Horns heat action, you can only use this against an enemy who has their back against a wall. Simple enough to use this in random encounters in Rakugai.
| Equipment | Greatsword/Club |
| Target | All enemies |
| Power | 350 |
| Heat Consumption | 8000 |
| How to Learn | From 9-5, after getting the fly picture, look at the man at Yoshioka Dojo and have the revelation |
| How to Use | While using the greatsword style, go near an enemy who has their back against a wall |
| Where to Use | Any battlefield which has a wall (e.g. Rakugai) - but it cannot be used in Gion |
| Note | You get the fly picture when you complete request 85 |

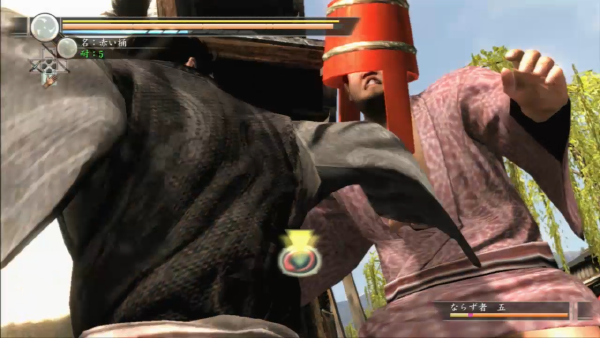
Strong Sword - Monkey Flip
This is the first of the Strong Sword heat actions you can learn in the game. This is a counter heat action, used when a sword-wielding enemy attacks you.
| Equipment | Greatsword/Club |
| Target | Sword-wielding enemies |
| Power | 350 |
| Heat Consumption | 8000 |
| How to Learn | From 5-13, after getting the monkey picture, watch the "Leaping Monkey" show at the theatre in Rakugai and have the revelation |
| How to Use | While using the greatsword style, when a sword-wielding enemy attacks you |
| Where to Use | Anywhere except Gion |
| Note | You get the monkey picture from Shichigoro when you are at least level 17 |

Shortsword - Twin Bones
You might not get many opportunities to use a shortsword weapon during the main story, so it might be a good idea to enter the arens using the shortsword option to get a good chance to use this heat action.
| Equipment | Shortsword |
| Target | Sword-wielding enemies (does not work on enemies using wooden swords) |
| Power | 310 |
| Heat Consumption | 6000 |
| How to Learn | From 5-4, after getting the dog picture, look at the dog in Rakugai and have the revelation |
| How to Use | While using a shortsword, when a sword-wielding enemy attacks you |
| Where to Use | Anywhere except Gion |
| Note | You get the dog picture from Shichigoro when you are at least level 15 |

Shortsword - Swirling Death
Like with the Shortsword - Twin Bones heat action, you might find it easier to execute in the arena. Attack the enemy with standard attacks until they start defending, then you'll be able to use this heat action.
| Equipment | Shortsword |
| Target | All enemies |
| Power | 300 |
| Heat Consumption | 6000 |
| How to Learn | From 8-1, after getting the swirling dragon picture, look at the children at Riverside Tea House and have the revelation |
| How to Use | While using a shortsword, go near a defending enemy |
| Where to Use | Anywhere except Gion |
| Note | You get the swirling dragon picture from the old man at Riverside Tea House in 8-1 |

Shortsword - Phantom Wolf
Unlike the other shortsword heat actions, you won't be able to execute this in the arena. You must line up 4 enemies in front of you in order to pull this one off.
| Equipment | Shortsword |
| Target | All enemies (except bosses) |
| Power | 110 x4 (110 against all 4 enemies) |
| Heat Consumption | 10000 |
| How to Learn | From 9-8, after getting the howling wolf picture, look at the wolf at Cliff Road and have the revelation |
| How to Use | While using a shortsword, run towards a group of at least 4 enemies lined up in front of you |
| Where to Use | Anywhere except Gion |
| Note | You get the howling wolf picture from Shichigoro when you are at least level 30. Also, you must successfully complete the following heat action, or the heat action will stop part-way through: - - |
Mysteries of the Sword - Single Stream
A boss-specific heat action. See the note section below for the 5 bosses against whom you can use this attack.
| Equipment | Single Sword |
| Target | Specific bosses (see note) |
| Power | 250 |
| Heat Consumption | 12000 |
| How to Learn | Clear the "Foundational Zeal" stage of the melon cutting training (available from 9-1) |
| How to Use | While using the single sword style, get the boss' health down to 30-50% to trigger. |
| Where to Use | Can be used against bosses from 9-6 |
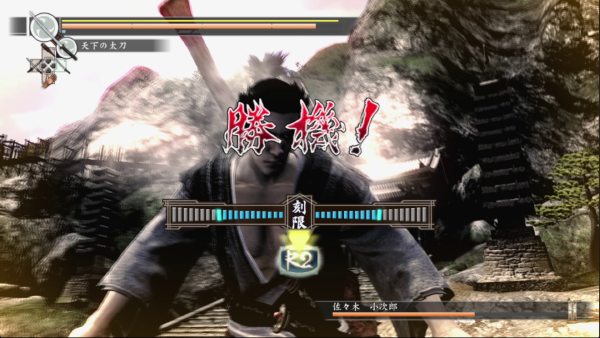
| Note | Yoshioka Seijuro / Gion Toji / Shishido Baiken / Marume Nagayoshi / Sasaki Kojiro |

Mysteries of the Sword - Firm Judgment
A boss-specific heat action. See the note section below for the 5 bosses against whom you can use this attack.
| Equipment | Greatsword/Club |
| Target | Specific bosses (see note) |
| Power | 250 |
| Heat Consumption | 12000 |
| How to Learn | Clear the "Applied Zeal" stage of the melon cutting training (available from 9-1) |
| How to Use | While using the greatsword style, get the boss' health down to 30-50% to trigger. |
| Where to Use | Can be used against bosses from 9-6 |
| Note | Yoshioka Seijuro / Gion Toji / Shishido Baiken / Marume Nagayoshi / Sasaki Kojiro |

Mysteries of the Sword - Two Heavens
A boss-specific heat action. You can't learn this until 10-8 so there aren't many opportunities to use this. See the note section below for the list of bosses against whom you can use this.
| Equipment | Two Swords |
| Target | Specific bosses (see note) |
| Power | 300 |
| Heat Consumption | 8000 |
| How to Learn | Clear the "Developed Zeal" stage of the melon cutting training (available from 10-8) |
| How to Use | While using the two swords style, get the boss' health down to 30-50% to trigger. |
| Where to Use | Can be used against bosses from 10-17 |
| Note | Shishido Baiken / Marume Nagayoshi / Sasaki Kojiro |

Mysteries of the Sword - Dry Leaf Smash
The first boss-specific heat action you learn. This can only be used against Hozoin Inshun, so your only change to execute it is in 8-12
. If you miss your chance you'll have to reload a save and try again.| Equipment | Single Sword |
| Target | Hozoin Inshun |
| Power | 300 |
| Heat Consumption | 8000 |
| How to Learn | Clear the "Zeal Special Training [Wild Boar]" stage of the melon cutting training (you complete it during the main story, at 8-8) |
| How to Use | Successfully complete the QTE ( > > > > ) then press when prompted |
| Where to Use | 8-12 |
| Note | This can only be performed against Hozoin Inshun |

Mysteries of the Sword - Escape Strike
A heat action that can only be used in the Shishido Baiken boss fight at 10-17. Don't forget to use the two swords style to pull this off.
| Equipment | Two Swords |
| Target | Shishido Baiken |
| Power | 250 |
| Heat Consumption | 12000 |
| How to Learn | Clear the "Zeal Special Training [Snake]" stage of the melon cutting training (available from 10-11) |
| How to Use | While using the two swords style, successfully complete the QTE ( > > ) then press when prompted |
| Where to Use | 10-17 |
| Note | This can only be performed against Shishido Baiken (in the Kiyomizudera fight) |
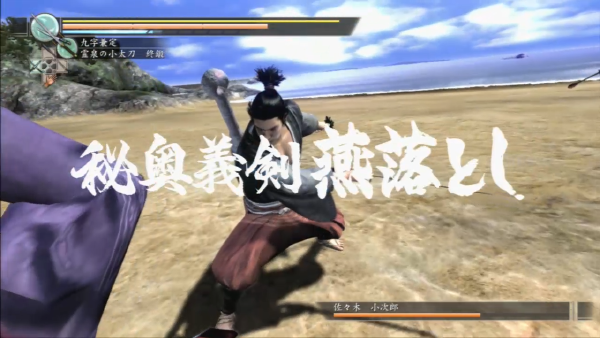
Mysteries of the Sword - Swallow Drop
The last boss-specific heat action you can learn. This can only be used against Sasaki Kojiro in 12-6.
| Equipment | Two Swords |
| Target | Sasaki Kojiro |
| Power | 300 |
| Heat Consumption | 8000 |
| How to Learn | Clear the "Zeal Special Training [Asura]" stage of the melon cutting training (available from 12-4) |
| How to Use | While using the two swords style, successfully complete the QTE ( > > > > > ) then press when prompted |
| Where to Use | 12-6 |
| Note | This can only be performed against Sasaki Kojiro |

Gion Martial Arts - Sword Take
A brawler style heat action. It's a move that takes the enemy's sword off them. Note that this cannot be used against bosses or ninja enemy types.
| Equipment | Unarmed |
| Target | Sword-wielding enemies (except bosses and ninja) |
| Power | 170 |
| Heat Consumption | 6000 |
| How to Learn | Clear the "Gion Martial Arts Secret Technique #1" training at the Gion dojo (available from 6-1 - also you must be at least level 20 to learn it) |
| How to Use | While using the brawler style, use when an enemy attacks you with a sword |
| Where to Use | Anywhere you can find sword-wielding enemies |
| Note | N/A |
Gion Martial Arts - Bowl Crusher
There are not too many places where you can execute this heat action. The easiest place would probably be in a random encounter at River Road 2, where you can use a bench to pull this off.
| Equipment | Unarmed |
| Target | All enemies |
| Power | 290 |
| Heat Consumption | 6000 |
| How to Learn | Clear the "Gion Martial Arts Secret Technique #2" training at the Gion dojo (available from 7-3 - also you must be at least level 25 to learn it) |
| How to Use | While using the brawler style, use when you are near an enemy who is next to a knee-high stand of some description (e.g. bench, short wall) |
| Where to Use | Any battlefield that has a knee-high platform. For example, River Road 2, the alley in front of the Gion dojo, the area in front of the kabuki theatre in Rakugai. See the encounters page for more. |
| Note | N/A |
Gion Martial Arts - Counter Attack [Black Tortoise]
One of the 4 variations of the Gion Martial Arts - Counter Attack heat action. This one is performed against an enemy attacking you from the front.
| Equipment | Unarmed |
| Target | All enemies (except bosses) |
| Power | 260 |
| Heat Consumption | 5000 |
| How to Learn | Clear the "Gion Martial Arts Secret Technique #3" training at the Gion dojo (available from 9-1 - also you must be at least level 32 to learn it) |
| How to Use | While using the brawler style, use when an enemy attacks you from the front |
| Where to Use | Anywhere |
| Note | N/A |

Gion Martial Arts - Counter Attack [Vermilion Bird]
One of the 4 variations of the Gion Martial Arts - Counter Attack heat action. This one is performed against an enemy attacking you from behind.
| Equipment | Unarmed |
| Target | All enemies (except bosses) |
| Power | 260 |
| Heat Consumption | 5000 |
| How to Learn | Clear the "Gion Martial Arts Secret Technique #3" training at the Gion dojo (available from 9-1 - also you must be at least level 32 to learn it) |
| How to Use | While using the brawler style, use when an enemy attacks you from behind |
| Where to Use | Anywhere |
| Note | N/A |
Gion Martial Arts - Counter Attack [Azure Dragon]
One of the 4 variations of the Gion Martial Arts - Counter Attack heat action. This one is performed against an enemy attacking you from the right.
| Equipment | Unarmed |
| Target | All enemies (except bosses) |
| Power | 260 |
| Heat Consumption | 5000 |
| How to Learn | Clear the "Gion Martial Arts Secret Technique #3" training at the Gion dojo (available from 9-1 - also you must be at least level 32 to learn it) |
| How to Use | While using the brawler style, use when an enemy attacks you from the right |
| Where to Use | Anywhere |
| Note | N/A |
Gion Martial Arts - Counter Attack [White Tiger]
One of the 4 variations of the Gion Martial Arts - Counter Attack heat action. This one is performed against an enemy attacking you from the left.
| Equipment | Unarmed |
| Target | All enemies (except bosses) |
| Power | 260 |
| Heat Consumption | 5000 |
| How to Learn | Clear the "Gion Martial Arts Secret Technique #3" training at the Gion dojo (available from 9-1 - also you must be at least level 32 to learn it) |
| How to Use | While using the brawler style, use when an enemy attacks you from the left |
| Where to Use | Anywhere |
| Note | N/A |
Gion Martial Arts - Gun Block
This is learned late in the game, in 11-1. You can find enemies using guns in random encounters at this point in the story, so you shouldn't have a problem using this.
| Equipment | Unarmed |
| Target | Gun-wielding enemies |
| Power | 290 |
| Heat Consumption | 6000 |
| How to Learn | Clear the "Gion Martial Arts Secret Technique #4" training at the Gion dojo (available from 11-1 - also you must be at least level 35 to learn it) |
| How to Use | While using the brawler style, go near an enemy who has a gun |
| Where to Use | Anywhere you can find gun-wielding enemies |
| Note | N/A |
Gion Martial Arts - Sword Reversal
There are special conditions which enable you to learn this heat action. Can be a risky move to try and pull off, so be careful when trying to use it. Don't forget to heal after pulling it off.
| Equipment | Unarmed |
| Target | Sword-wielding enemies (except bosses) - doesn't work on enemies using wooden swords |
| Power | 360 |
| Heat Consumption | 6000 |
| How to Learn | From 12-2, see Komaki and Shibusawa's showdown at Sanjusangendo and have the revelation |
| How to Use | While using the brawler style, hold when an enemy attacks you with a sword to use this (your health must be below 20% for this to work) |
| Where to Use | Anywhere |
| Note | N/A |

Deathblow - Avidya Wasteland
This can only be used against stunned enemies. There are various ways to achieve this, but the simplest way is probably to use a light two-handed weapon (like a box or stool) and repeatedly hit an enemy, which should stun them after about 5 hits.
| Equipment | Unarmed |
| Target | All enemies |
| Power | 500 |
| Heat Consumption | 10000 |
| How to Learn | Learn after successfully performing all 56 heat actions listed above (in other words, get 100% completion on the heat action category to unlock this) |
| How to Use | While using the brawler style, go near a stunned enemy (you must be at maximum heat to use this) |
| Where to Use | Anywhere |
| Note | N/A |
Heat Action Completion Note
You will only be able to perform all 56 heat actions during the main story. You can't fight story bosses in the premium adventure mode, so the boss-specific heat actions cannot be used in this mode. However, you cannot actually learn and use the Deathblow - Avidya Wasteland heat action in your first run through of the game - it can only be learned and used on either your second playthrough of your save (premium new game) or if you load up your clear save data in premium adventure mode. This heat action doesn't count towards any completion so don't worry too much about it.
After completing the game and using your clear save data for either premium new game or premium adventure, you'll receive the item which unlocks the final heat action.
Mysteries of the Sword
The mysteries of the sword heat actions are boss-specific heat actions. In some cases you only get one chance to pull it off in the main game. If you miss your chance, you cannot get 100% completion in the heat action category. This section goes into more detail about the bosses against whom you can use these heat actions.
Learning and using these heat actions
There are 6 mysteries of the sword heat actions in total. The first one is learned in 8-8. See below for details on when you can learn them all. 3 of these are specific to a single boss, so watch out for that during your playthrough if you don't want to miss out on using them. The other 3 can be used against various different bosses. However, two of them - Shishido Baiken and Sasaki Kojiro - have a heat action specific to them, so you're better off using the non-specific heat actions against Yoshioka Seijuro, Gion Toji, and Marume Nagayoshi. The heat actions against Shishido Baiken and Sasaki Kojiro are more difficult to pull off, so refer to the information below to help you.
If you are not in heat mode when the heat action is triggered, you get the opportunity to repeatedly press to build up your heat gauge.
Advice for using mysteries of the sword
Mysteries of the Sword - Dry Leaf Smash

You learn this right before entering the tournament in which you fight Hozoin Inshun. This can only be used against Ishun so if you don't pull it off you don't get another chance. There is a save point right next to the reception, so you could save just before entering the tournament and reload if you fail to use it.
Mysteries of the Sword - Single Stream
You can learn this any time from 9-1 along with the next one (Firm Judgment), so it's up to the player which of the two they want to use in this fight. You can save at the Yoshioka Dojo right before going to the field to fight Seijuro to be safe - you can reload if you fail to use this.
Mysteries of the Sword - Firm Judgment

You can learn this any time from 9-1 along with the previous one (Single Stream), so it's up to the player which of the two they want to use in this fight. Toji summons loads of guys to fight alongside him. You might want to equip the greatsword/club weapon for the whole of this fight so you don't miss your chance to use this.
Mysteries of the Sword - Escape Strike

You can learn this any time from 10-11. You have to fight through a whole army of his henchmen before getting to him, so if you miss your chance to pull this one off, it will take a while to fight your way through for a second chance (if you reload your save to try again). You must successfully complete a QTE to use this ( > > ). You might want to use the two swords style in this fight to ensure you don't miss your chance to use it.
Mysteries of the Sword - Two Heavens

You can learn this any time from 10-8. You can use this in the fight against Shishido, but he has a heat action specific to him (Escape Strike) so you're better off using two heavens against Marume. There is a bit of fighting before getting to Marume, but to pull this one off you only have to press for this so it's easier to execute.
Mysteries of the Sword - Swallow Drop
You can learn this any time from 12-4. This can only be used against Sasaki Kojiro. You must complete a QTE before executing this heat action: > > > > > and then finally pressing when prompted. Interestingly, you only actually need to successfully get that last and the following to use this. I guess the game is more generous with this one. However, you will take damage for each failed button prompt in the QTE, so be careful.


